Pre‑Wedding Photography in Ooty (Nilgiri Mountains): The Complete Guide for Couples & Photographers
Pre‑Wedding Photography in Ooty (Nilgiri Mountains): The Complete Guide for Couples & Photographers
Ooty is one of the most “complete” pre‑wedding destinations in South India because you can shoot multiple visual moods in a single trip—tea gardens, misty mountains, heritage vibes, lakeside frames, forest roads, and garden romance. If you plan the timing, weather strategy, outfits, and gear protection properly, you’ll come back with a portfolio-worthy set instead of “nice photos with random backgrounds.”
1) What makes Ooty special for pre‑wedding shoots
1. Cinematic variety within short drives
You can create 5–8 distinct looks without long travel days: tea estate lines, mountain viewpoints, old-world architecture, gardens, pine forests, and lakes.
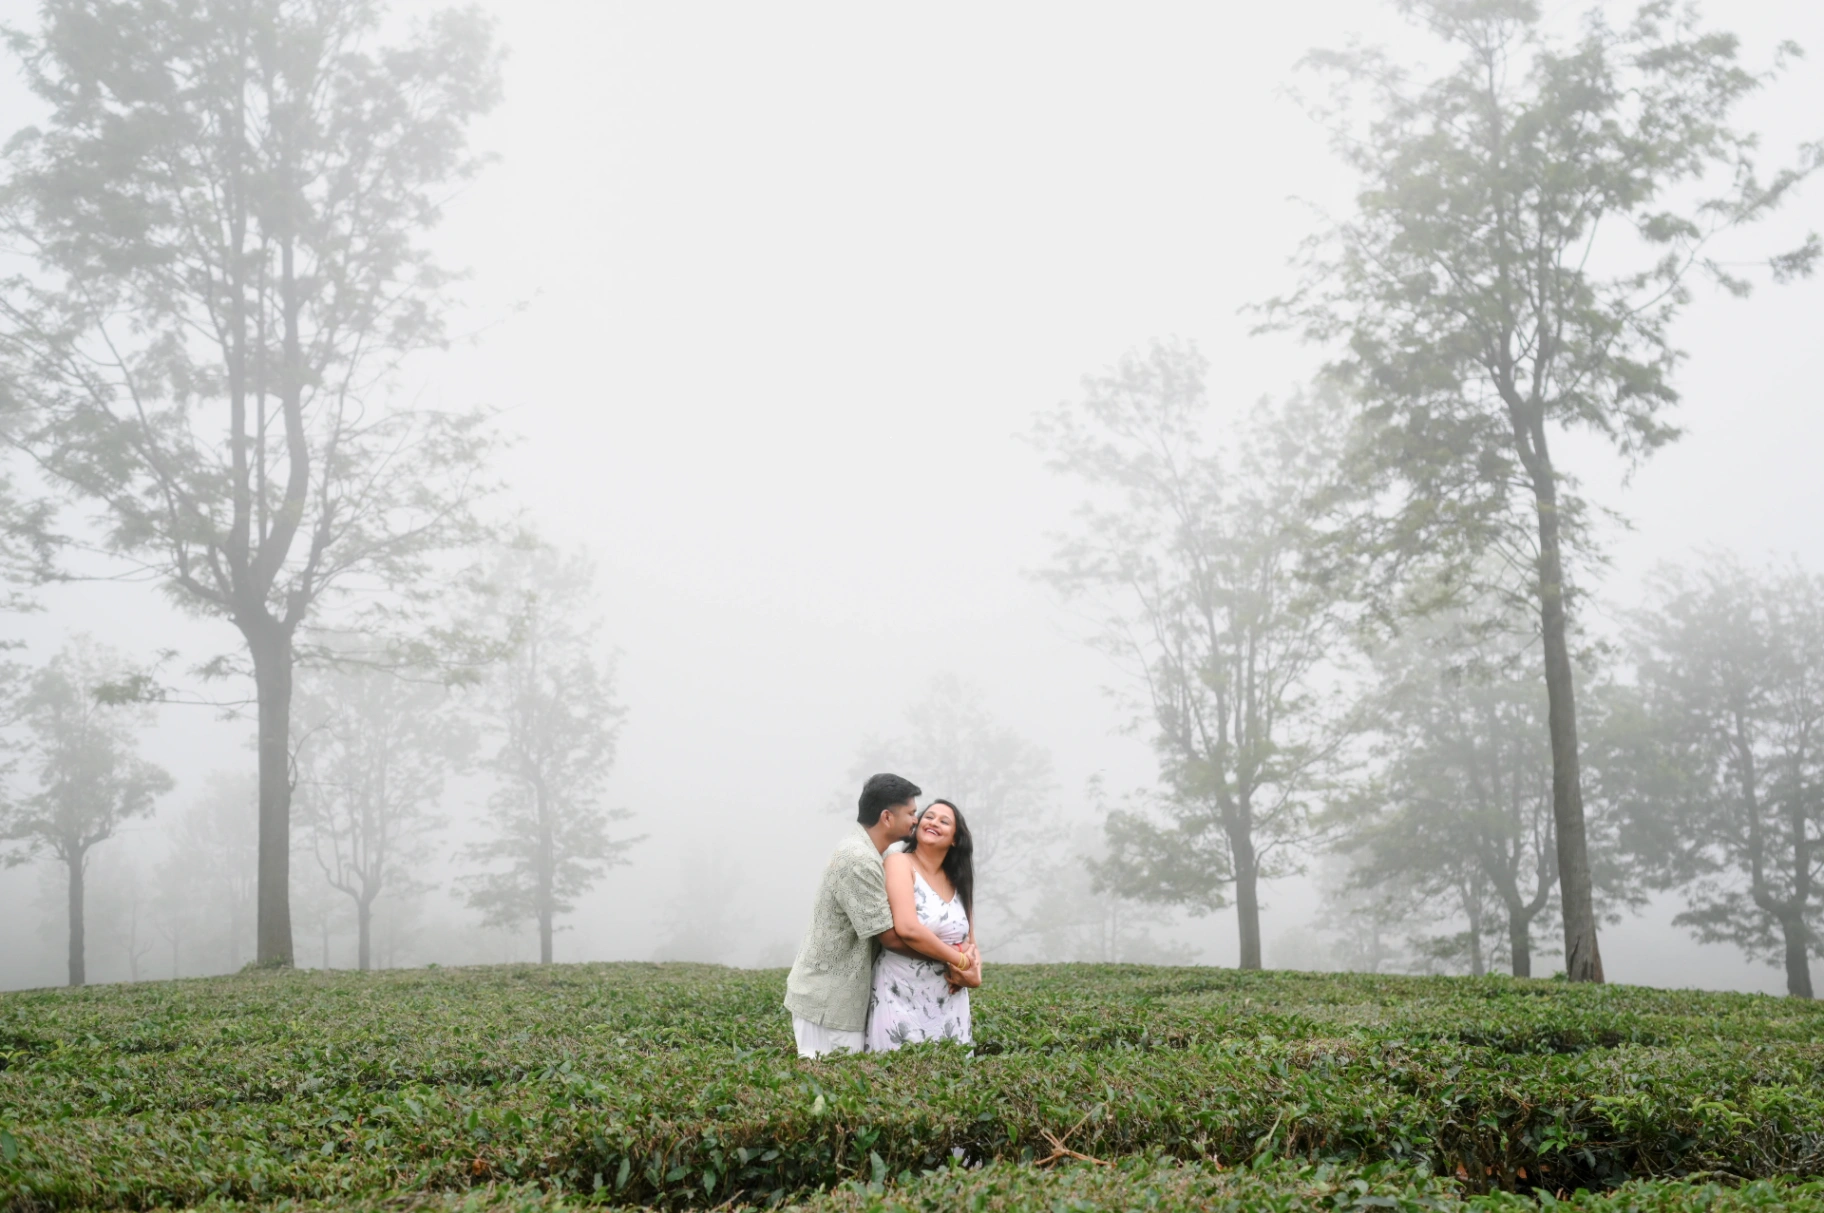
2. Mist = mood (when controlled)
Fog and low clouds are a signature Nilgiri look. The same location can look dreamy, dramatic, or bright depending on cloud cover—so you can “change sets” without changing places.
3. Works for both couples and photographers
Couples get a comfortable “vacation + shoot” experience. Photographers get textures, layers, leading lines, and deep backgrounds that elevate compositions.
2) Best shoot seasons + how each season looks on camera
Ooty can be shot almost all year, but the feel changes by season. Here’s the practical version:
Summer (generally Mar–Jun)
- Look: Clean, bright, pleasant greenery, clearer views.
- Best for: Soft romantic edits, colorful outfits, daytime frames.
- Risk: Crowds, especially at popular viewpoints and gardens.
Monsoon (generally Jul–Sep)
- Look: Lush greens, wet roads, heavy mist, dramatic skies.
- Best for: Moody cinematic storytelling, intimate frames, couple walking shots.
- Risk: Rain interruptions, slippery terrain, fog swallowing viewpoints.
Winter (generally Oct–Feb)
- Look: Crisp air, foggy mornings, cooler tones, layered styling.
- Best for: Cozy sweater looks, sunrise fog, premium “European hill-station” vibe.
- Risk: Cold mornings, faster battery drain, occasional haze.
Pro tip: Whatever the season, plan your “must-have frames” early morning. Clouds often build later, and crowds increase quickly.
3) Locations: iconic spots, quiet alternatives, and how to get “undisclosed” frames ethically
You’ll see the same 4–5 backgrounds everywhere because most teams go to the same obvious points. The goal is not to hide locations from the internet—it’s to create frames that look private, premium, and personal.
A) Iconic locations (great, but time-sensitive)
These spots can deliver stunning results if you shoot early, move fast, and control the angles:
- Botanical-style gardens (lawns, flower sections, tall trees): Great for elegant outfits, clean backgrounds, and editorial portraits.
- Lakeside zones: Good for calm wide shots, “date activity” storytelling, reflections, and sunset silhouettes.
- High viewpoints (peak areas): Best for grand wide shots, strong wind hair movement, and dramatic skies—also the most unpredictable for fog.
- Tea estates and tea-garden roads: The signature Nilgiri look—leading lines, curves, repetitive patterns, and scale.
B) “Undisclosed” locations (the professional way)
Instead of posting fragile GPS pins, use a repeatable method:
- Find micro-locations near the main ones
- A tea estate has dozens of angles: side roads, elevated corners, small slopes, and “in-between” paths. One estate can give you 3 different scenes.
- Ask permission where needed
- If a place looks like private property, treat it as private. A 2-minute conversation can save you a ruined shoot.
- Shoot early and off-peak
- The best “exclusive” look often comes from timing, not secrecy.
- Build frames that don’t reveal the exact spot
- Use tighter compositions, foreground layers, longer lenses, and shallow depth of field. Your images look premium and you avoid crowding sensitive areas.
C) Realistic travel-and-light planning
A strong Ooty pre‑wedding set usually needs:
- 1 sunrise session (mist + empty roads)
- 1 late afternoon session (warm light + lake/garden/estate)
- Optional blue-hour/night portraits if your couple wants a “movie poster” look
4) Styling guide: outfits, colors, and what works in Nilgiris
Ooty backgrounds are naturally busy (greens + textures + hills). Styling should simplify.
Colors that photograph beautifully
- Neutrals: beige, cream, brown, black, grey
- Earthy tones: olive, rust, mustard
- Romantic tones: maroon, wine, dusty pink
- Classic pop: red (works great in fog), royal blue (works in gardens)
Outfit ideas by location
- Tea estates: solids and minimal prints; flowy dresses/sarees; linen shirts; coordinated palettes.
- Gardens: pastel dresses, formal gowns, sarees with clean borders, suits/blazers.
- Mountain viewpoints: layered looks—coats, shawls, knitwear; avoid very thin fabrics that flap awkwardly in wind.
- Lakeside: casual date looks (white + denim / black + beige), plus one formal look for hero shots.
Footwear reality check
Couples often bring the wrong shoes. You need:
- 1 pair comfortable shoes for walking between frames
- 1 “photo-only” pair (heels/loafers) used only for controlled shots
5) Couple experience: how to look natural and not “posey”
A pre‑wedding shoot becomes magical when it feels like you—not like a catalogue. Here’s a simple approach:
- Talk while walking (real conversation beats fake smiles).
- Use “micro actions”: fixing hair, holding hands, adjusting shawl, looking at scenery together.
- Keep poses short: 10–20 seconds per pose, then change angle/movement.
- Warm-up first: start with casual outfits and easy locations before the hero looks.
If you’re camera-shy: agree on a “no-audience” schedule—sunrise, weekdays, or off-season.
6) Photographer deep dive: gear protection, workflow, and safety
Ooty is beautiful, but it’s also a moisture test. Mist + drizzle + cold can quietly ruin a shoot if you treat it like a normal outdoor session.
Moisture protection checklist (non-negotiable)
- Rain cover for camera + lens (at least one proper cover, not plastic alone)
- Microfiber cloths (multiple)
- Rocket blower
- Silica gel packs in your bag
- Zip pouches or dry bags for “wet gear isolation”
- Lens hood always on (reduces droplets and flare)
- Extra batteries (cold drains faster)
- Simple towel in the car (for hands + gear)
Anti-fog and condensation rule
If you move from cold outdoors to a warm car/hotel, condensation can form.
Best practice: keep gear in the bag for 15–20 minutes to acclimatize before opening it.
What to carry (lean and fast)
Ooty rewards mobility. A heavy kit slows you down when fog windows open for 5 minutes.
A practical two-body setup:
- Body 1: 24–70mm (main storytelling + portraits)
- Body 2: 70–200mm (compressed landscapes + private-looking frames)
- Optional: 35mm or 50mm prime for intimate, natural moments
Protect your team and couple
- Wet grass + slopes = slips. Don’t chase “one more angle” if footing is risky.
- Keep a warm layer and water for the couple—comfort shows on the face.
- Always have a “Plan B location” nearby when fog hides the view.
7) Permits, etiquette, and crowd management
Even when a location is publicly accessible, shooting with a big team can attract attention quickly.
- Keep your crew minimal and disciplined.
- Avoid blocking pathways.
- Don’t use smoke bombs or anything that damages the environment.
- If someone asks you to stop, don’t argue—switch to your Plan B and save the day professionally.
8) Pricing strategy (for photographers): quote like a production, not a local shoot
Ooty is not priced like a 2-hour local session. It includes travel time, unpredictable weather, and “waiting for the light” moments.
A) Package structure that works
Option 1: 1-Day Ooty Pre‑Wedding
- One sunrise or one sunset session + one location cluster
- Ideal for couples who want a short trip
Option 2: 2-Day Ooty Storytelling (Recommended)
- Day 1: sunset + blue hour
- Day 2: sunrise + late morning portraits
- Gives you weather backup and better outfit variety
Option 3: 3-Day Premium Film + Photo
- Adds leisure, multiple looks, and safer buffers
- Best for cinematic concepts and relaxed pacing
B) Line items to include in your quote
- Creative fee (shoot + direction + edit style)
- Travel (driver/fuel or flights, depending on your base)
- Stay (your team’s accommodation)
- Assistant cost (strongly recommended in misty conditions)
- Makeup/hair + touch-ups (if included)
- Outfit support (stylist optional, but valuable)
- Deliverables (number of edited photos, teaser timeline, album/prints)
C) Simple pricing technique (protect your profit)
Quote with a weather buffer:
- If the couple wants “only sunrise,” charge for the risk—because if sunrise fogs out, you need time for an alternate window.
- If they want multiple outfits and locations, charge per “look block” (not per hour). It’s clearer and prevents scope creep.
9) Sample 2-day shoot plan (copy-paste itinerary)
Day 1 (Arrival + sunset)
- 3:30 PM: Couple styling + travel to Location Cluster A (tea estate roads / quiet bends)
- 4:30–6:15 PM: Golden hour shoot (Look 1: casual or semi-formal)
- 6:30–7:15 PM: Blue hour portraits (Look 2: darker tones / coats / shawls)
Day 2 (Sunrise + clean portraits)
- 5:30 AM: Start early (mist roads / viewpoints if clear)
- 6:15–8:00 AM: Sunrise shoot (Look 3: hero outfit)
- 9:30–10:30 AM: Garden-style portraits (Look 4: elegant)
- 10:30 AM: Wrap (backup slot if the sunrise got fogged out)
10) Final checklist (for couples)
- Confirm shoot dates with a weather-flex mindset.
- Pack 2 warm layers (especially for early morning).
- Carry a small bag with: tissues, water, lip balm, compact powder, hair pins, safety pins.
- Choose outfits that allow walking and quick changes.
- Decide 10 “must-have” photos you want (so the shoot has direction).